GMetri built its own server-rack and cut cloud costs by 75%

The most common way of hosting new services is to rent Virtual Machines (VMs) from Amazon Web Services (commonly called Elastic Compute Cloud or EC2) or Google Cloud Platform (commonly called Google Compute Engine or GCE).

While these are the easiest ways of getting a VM up and running within minutes, these methods have strings attached. Running VMs on AWS or GCE isn’t always the most efficient use of money, especially with startup budgets. It also increases one’s dependence on large cloud providers.

Why do you think so many new Clould Compute companies come up every year even though we already have AWS and GCE? Because there’s enough value left on the table for incumbents to try and lower the margins. The price to performance ratio is also one of worst with the above mentioned companies.

To keep costs in control AND get good performance for our services, we took an unorthodox route (for startups at-least) - build our own mini data-center in-house (ahem.. a single server-rack for starters).

In-house services run by GMetri, the Virtual Reality Company, are the same that most companies need from day 1 to function efficiently: chat (Zulip), storage (Nextcloud), git (Gitea), docker, Video Confernce (Jitsi), centralized login (LDAP), other VMs.

How it all started

Long before we setup our first server-rack, we were already using a few desktop machines like servers. At the time, we used KVM as our hypervisor. All the steps have been detailed in this repo. The biggest hurdle while doing this was setting up the bridge network  to make the VMs behave as if they were standalone servers on our network

Benefits of hosting your own server-rack

  • Much better performance than we had ever imagined
  • Superb flexibility
  • Developer specific VMs, personal Kubernetes clusters. Note: following the “general guidelines” of giving every developer their own VM or a Kubernetes cluster is generally out of scope any startup’s (actual startup, not large companies masquerading as startups) shoestring budgets

Steps involved in setting up the server-rack

  1. Purchase a server rack housing, switch, lots of storage, and server system (more about specific configurations in a separate post)
  2. Prepare server trays
  3. Put the switch, server trays into the server rack. Link up the power and LAN cables

A few pics of the process:
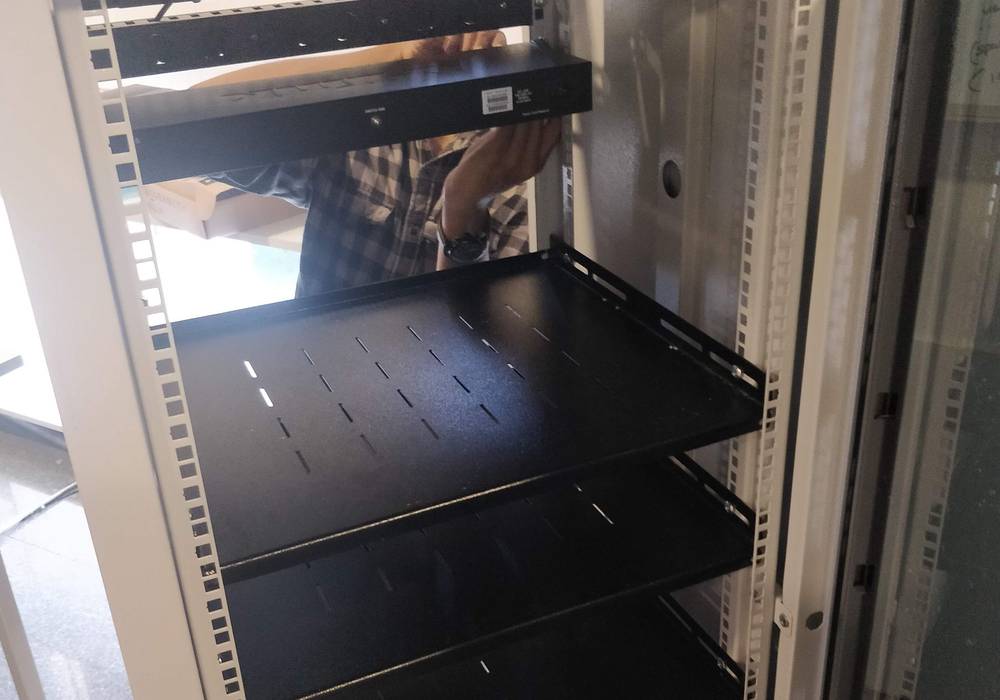
1. Empty Server Trays
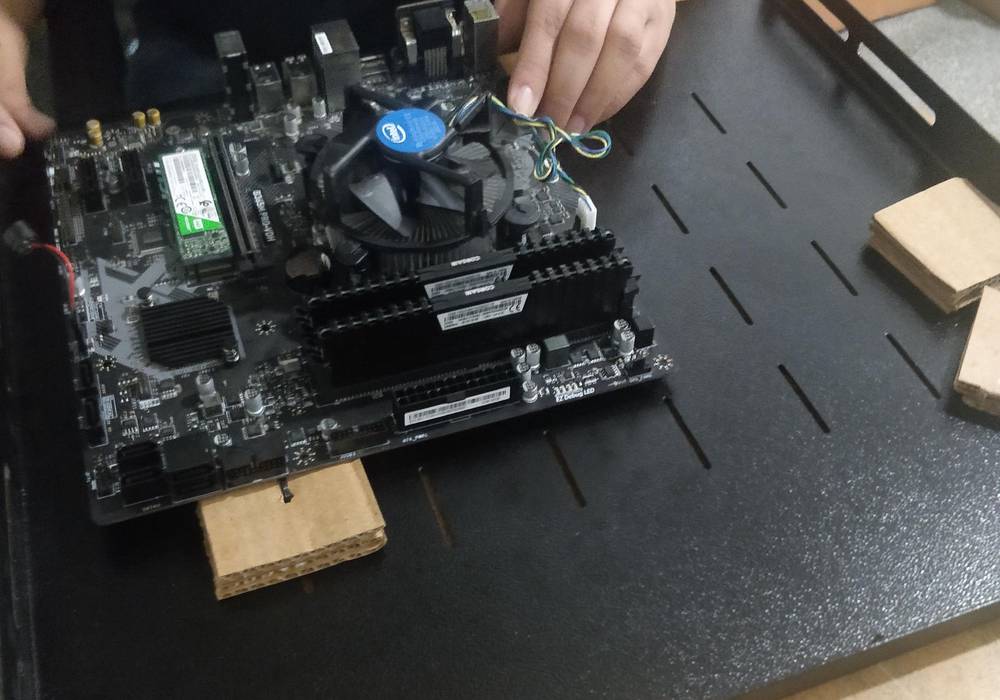
2. Mounting motherboards on server trays (after a few misses, this process has now become a lot more efficient)
3. Putting prepared trays back into the server rack

Cluster Management

There were two popular options we compared while deciding which software to use for cluster management - oVirt and Proxmox.

oVirt

oVirt is a open-source virtualisation software founded by Red Hat. It has a steep learning curve and used mostly of large server deployments.

Proxmox

Initially we were sceptical of using Proxmox. But later, the simplicity won us over. For beginners, the WebUI is a life saver, and for advanced tasks there is a suite of commands on command line. The deciding factor for us was the easy setup of Ceph cluster within proxmox. We have a very heavy storage requirement, and it turns out ceph is just what we were looking for. Most of our VMs also run on virtual disks (like EBS) setup using Ceph’s RADOS Block Devices.
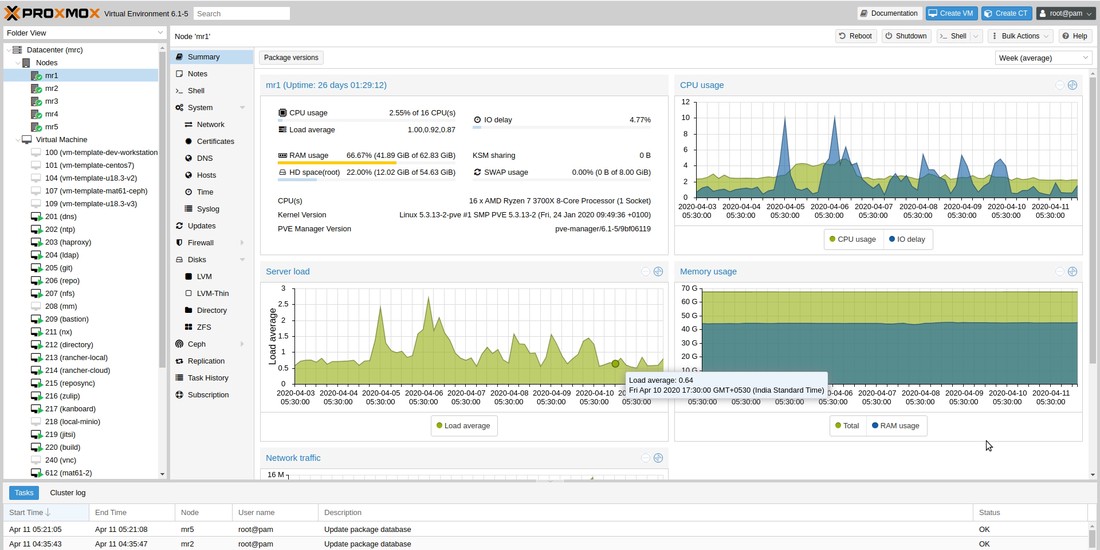
Proxmox's Web based Control Center

Way Forward

I believe that if not for all services, around 70% to 90% non-prod services can easily be ported to one’s own cloud.

Here’s a time-lapse of the whole process

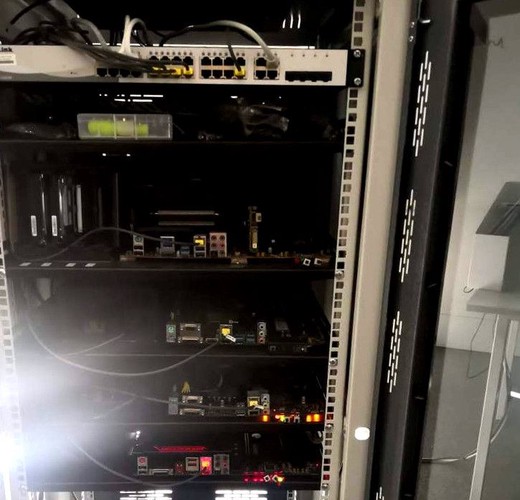
On a closing note, the server rack looks like this currently :). We might soon need to purchase a few more.
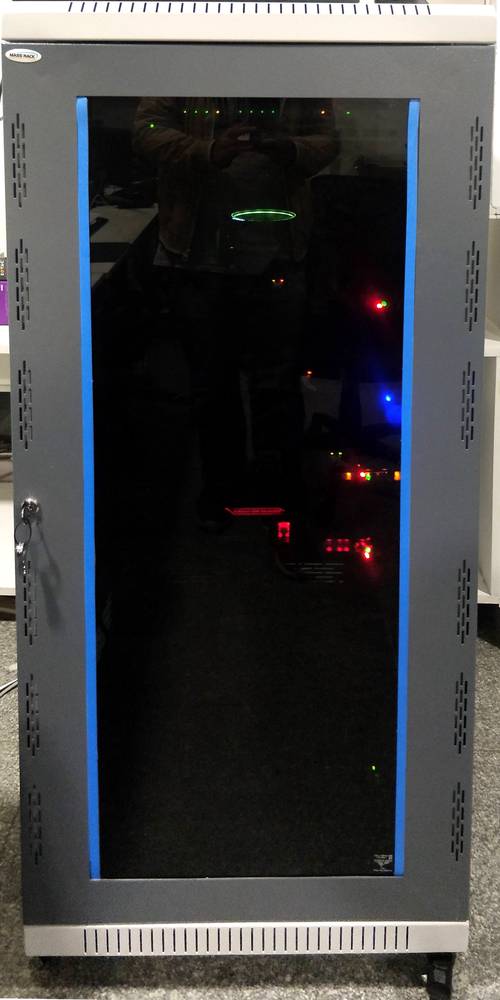
Server Rack, from outside

Adding a QR Code Scanner to your Website

Barcode and QR code have become common in our day to day shopping and searching experience. Almost everyone has a QR Code Scanner installed in their phones as separate app or as a part of the camera.

You might want to add QRCode scanning as a part of your website. This simple addition opens up a world of possiblities - potentially improving the user experience of your users by leaps and bounds. Below you will learn how to add a simple QR Code Scanner to your Website.

You don’t need a native app to be able to scan QR codes - simple javascript can do the trick. We will use a npm package react-qr-reader. Add the following code to your javascript to get the QR Code scanner working:

1
2
3
4
5
6
7
8
9
10
11
12
13
14
15
16
17
18
19
20
21
22
23
24
25
26
27
28
29
30
31
32
import React, { Component } from 'react'
import QrReader from 'react-qr-reader'

class Test extends Component {
state = {
result: 'No result'
}

handleScan = data => {
if (data) {
this.setState({
result: data
})
}
}
handleError = err => {
console.error(err)
}
render() {
return (
<div>
<QrReader
delay={300}
onError={this.handleError}
onScan={this.handleScan}
style={{ width: '100%' }}
/>
<p>{this.state.result}</p>
</div>
)
}
}

After this, add the component <Test> to the page where you want the QR Code scanner and handle the data scanned in the handleScan function in the code above.

Scanning Website URLs and Opening them on an iframe

This technique can also be used to scan a URL and open it in a iframe rendered as a react component. There are a few things to remember in this approach:

  1. Most website today have X-Frame-Options header set to SAMEORIGIN. This blocks the website from loading in an iframe. You can only open URLs that have the X-Frame-Options header is set to ALLOW-FROM https://<your-website-url>
  2. OR Website from the same domain name as your iframe. Here is a MDN article explaining the same.

In case you aren’t able to load the website in your frame, and you have access to the website’s code, try adding the X-Frame-Options header to fix the issue.

H Laws

H Laws

Hofstadter’s Law:

A task always takes longer than you expect, even when you take into account Hofstadter’s Law.

Hartree’s Law:

Whatever the state of a project, the time a project-leader will estimate for completion is constant.

And then there’s also an “A” law:

Atwood’s Law:

Any application that can be written in JavaScript, will eventually be written in JavaScript. 🔗

Do Main DEV

Once again, changing domain

This time to a .dev domain - https://doku.dev

Doku - inspired from dokuwiki - the wiki system that basically started my love for wikis.
Also, looked up the following:

http://www.romajidesu.com/dictionary/meaning-of-doku.html:

1
2
3
doku  【 毒 】 毒 Kanji Details
1. (n) poison; toxicant この魚は毒がない。
2. harm; evil influence →Related words: 目の毒 , 毒する

¯\(ツ)/¯

Switching (back) from hugo to hexo

It has been really long since I blogged anything. The primary reason was that blogging and searching through the existing blog had become tougher than required. Probably because of Hugo and the theme that I selected in it.

Spent today shifting sahil.cc back from hugo to hexo. Ended up paying a heavy price for not sticking as closely as possible to the Markdown spec (and depending hugo/hexo specific plugins instead).

For Hexo theme, it was a close call between Hexo Next and Icarus. Finally Hexo Next won out for its ease of use.

Now live at https://www.sahil.cc

Keep Docker Running

Many times we need dockers containers to keep running after they are started started either by using a docker run / docker exec / docker-compose command or while running as a kubernetes pod.

Read more

Rooting One Plus One

  1. Install TWRP recovery steps
  2. Install Lineage OS 14.1 based on Android 7 and GApps using the “Install” option on TWRP via sd card. Link to the guide.

A few lessons learnt along the way

  • Ensure the USB wire being used can also transfer data
  • Useful commands:
    1
    2
    3
    4
    5
    6
    adb devices -l
    fastboot devices
    fastboot oem unlock
    fastboot flash recovery /path/on/laptop/recovery.img
    adb push /path/on/laptop/supersu-v2.82.zip /sdcard/
    adb devices -l

Everything About Yaml And Invision

Everything there is to know about yaml condensed in a great blog post here

Also, I was facing an issue in Ubuntu of not being able to copy by Alt + Dragging objects. This post saved my day.

Pressing the Super (windows) key along with Alt while dragging items prevents the default window drag in Ubuntu.

Does SELinux save you against rm -rf ?

Always wondered if there is way in SELinux to disable the deadly rm -rf at / path.
Maybe the command rm can be asked by selinux not to allow anyone to run it at / location with the option -rf *?

Could never find the time to experiment in a VM to find out. Have you?
Please let me know through the comments section!

UEFI Secureboot Hell

Spent a really long time yesterday trying to figure out how to edit UEFI boot options after my old Intel Core 2 Duo desktop refused to boot up on intstalling LinuxMint 18.3.

Had to learn more than I had bargained for about the EFI FAT32 partition at /dev/sda1 to fix it.
The efibootmgr command proved to be a lifesaver. And so did the script provided in this superuser.com post. May the person who wrote it live long and prosper.